
TL;DR:
- Bathroom waterproofing involves installing a continuous water-resistant membrane behind tiles to prevent moisture damage. Proper preparation, membrane application, seam sealing, and flood testing are crucial to ensure long-term waterproofing success. Regular maintenance and avoiding common mistakes protect your bathroom structure from mold, rot, and costly repairs.
Bathroom waterproofing is the process of creating a continuous water-resistant membrane behind tiles and at critical junctions to stop moisture from reaching your framing, subfloor, and walls. Without it, water migrates through grout and tile, causing mold, rot, and structural damage that costs far more to fix than the original waterproofing job. TCNA Method B422 requires a continuous membrane to protect the structure behind tile assemblies. This bathroom waterproofing tutorial walks you through every stage of the process, from gathering materials to flood testing, so you can do it right the first time.
What tools and materials do you need for bathroom waterproofing?
Getting your materials sorted before you start is the single biggest factor separating a clean installation from a frustrating one. Waterproofing is best treated as a complete integrated system where substrate, membrane, and sealant work together. Buying mismatched products from different systems is a common and costly mistake.
Membranes: sheet vs. liquid
Sheet membranes, such as Schluter Kerdi and Laticrete Hydro Ban Sheet, are pre-formed polyethylene or fabric-reinforced sheets that you embed in mortar. They offer consistent thickness and are easier to inspect visually. Liquid-applied membranes, such as Custom Building Products RedGard, are rolled or brushed directly onto the substrate and cure to form a flexible coating. Foam backer boards like Schluter Kerdi-Board combine insulation and waterproofing in one panel, which reduces installation steps.
| Membrane Type | Best For | Key Advantage |
|---|---|---|
| Sheet membrane (Schluter Kerdi) | Shower walls and floors | Consistent thickness, easy inspection |
| Liquid membrane (RedGard) | Complex shapes, curbs | Bonds to irregular surfaces |
| Foam backer board (Kerdi-Board) | Full wall assemblies | Combines substrate and waterproofing |
| Fabric band tape | Seams and corners | Reinforces joints in any system |
Tools you need on hand
Gather these before you open a single bag of mortar:
- Notched trowel (3/16-inch V-notch for membrane adhesion)
- Paint roller and tray (for liquid membranes)
- Utility knife and straightedge
- Measuring tape and marker
- Mixing paddle and bucket
- Sponge and clean water bucket
- Drain plug (for flood testing)
Pro Tip: For DIYers using sheet membranes, choose a product from a single manufacturer’s system. Schluter’s Kerdi system, for example, pairs its membrane with Kerdi-Fix sealant and Kerdi-Band corner tape, all engineered to work together. Mixing brands at critical joints voids most manufacturer warranties.
Substrate quality matters as much as the membrane itself. The surface must be flat, clean, structurally rigid, and free of dust or oil. Any flex in the substrate will crack the membrane over time, regardless of product quality.
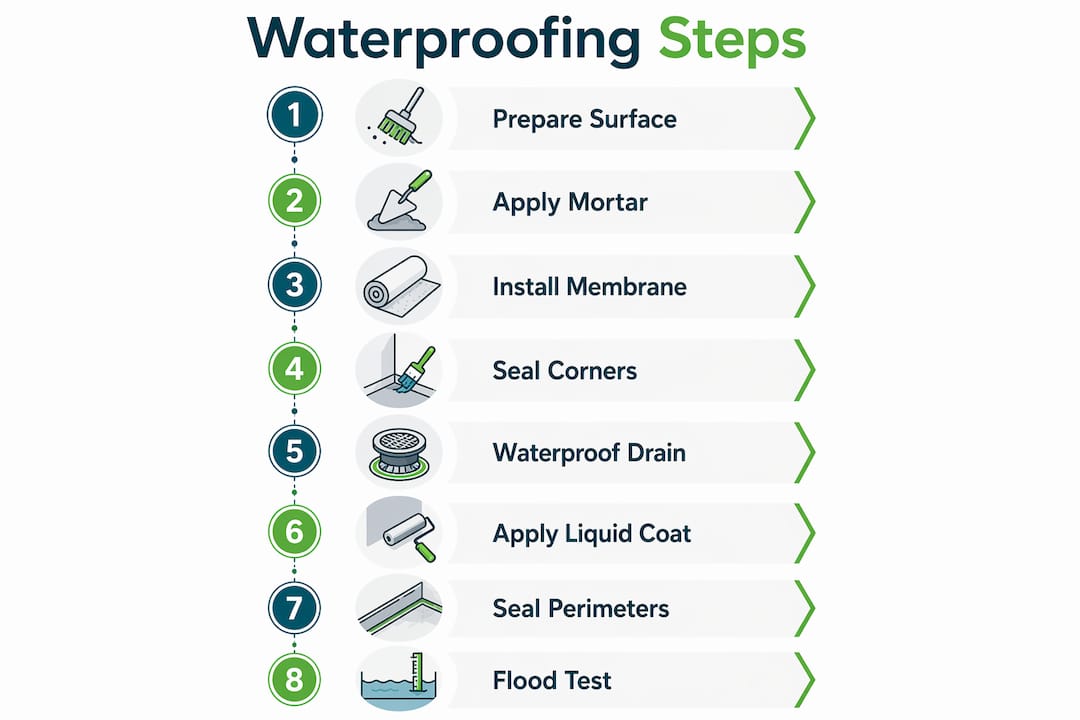
How to waterproof a bathroom: step-by-step installation
This section covers the full step-by-step bathroom waterproofing process from surface prep through final sealing. Follow the sequence exactly. Skipping or reordering steps is the primary reason DIY waterproofing fails.
Step 1: Prepare the substrate
- Remove all old tile, adhesive, and grout from the surface.
- Repair any cracks, holes, or soft spots in the substrate with patching compound.
- Check for flatness using a 6-foot straightedge. Variation greater than 1/8 inch over 10 feet needs grinding or skim-coating.
- Confirm the floor slopes toward the drain at a minimum of 1/4 inch per foot. Correct any flat or reverse-sloped areas with a mortar bed before proceeding.
- Vacuum and wipe the surface clean. Any debris under the membrane creates voids that trap water.
Step 2: Mix and apply mortar for membrane adhesion
Mix unmodified thin-set mortar to a peanut butter consistency. Spread it evenly with the notched trowel, working in sections no larger than you can cover before the mortar skins over (typically 10 to 15 minutes). Comb the mortar in one direction to create consistent ridges.
Step 3: Apply the sheet membrane
Membrane seams and corners must overlap by at least 2 inches and be fully embedded in mortar to prevent leak-prone gaps. Press each sheet firmly into the mortar with a float or grout sponge, working from the center outward to eliminate air pockets. Check that mortar squeezes through the membrane’s fleece backing uniformly.
Pro Tip: Cut your membrane pieces before mixing mortar. Dry-fitting every piece first lets you identify problem areas, like tight corners or drain cutouts, before you are working against the clock with wet mortar.
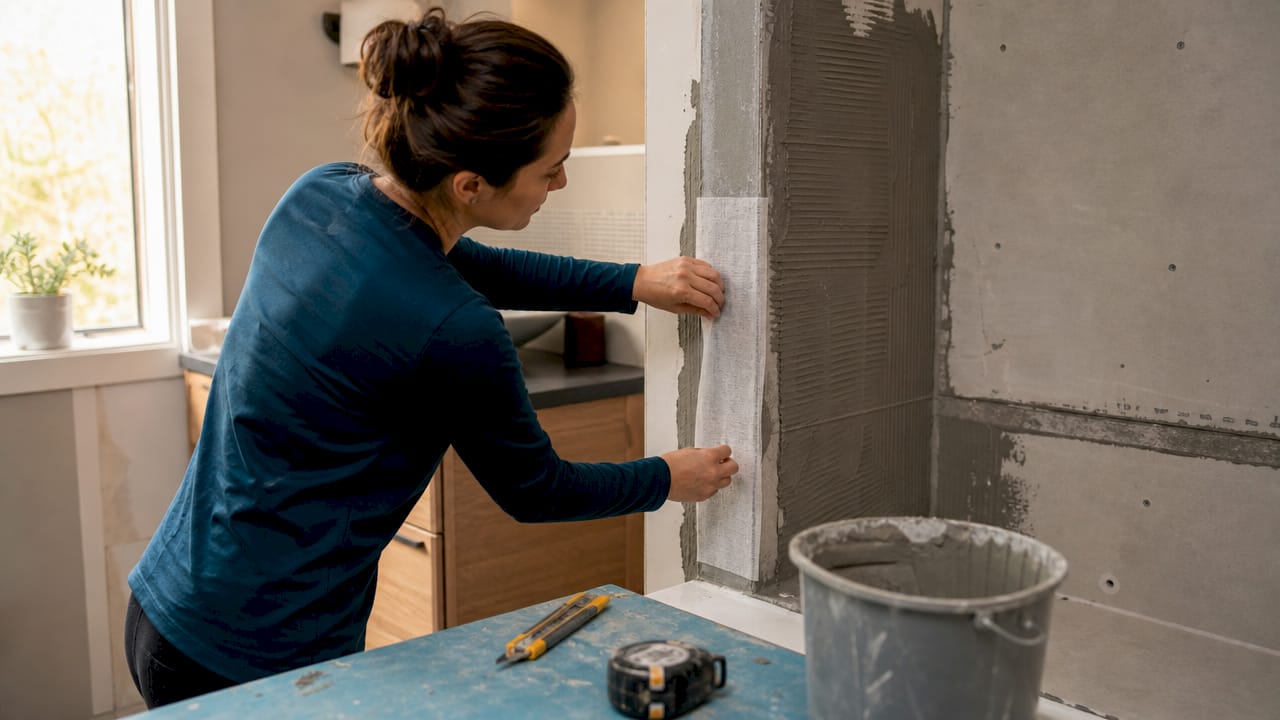
Step 4: Seal corners and seams
Inside and outside corners are the highest-risk points in any shower. Use pre-formed corner pieces or Kerdi-Band fabric tape embedded in mortar at every inside corner where walls meet the floor. For outside corners, use pre-formed outside corner pieces rather than trying to fold the membrane. Overlap all seams by a minimum of 2 inches and press firmly to eliminate any bridging.
Step 5: Waterproof the drain connection
The drain flange is the most leak-prone area in any shower installation. The membrane must bond directly to the drain flange, and the drain must accommodate weep holes so water that gets under the tile can still exit. For Kerdi systems, use a Kerdi-Drain that accepts the membrane directly. For liquid membranes, apply the coating up to and over the drain flange, then seal the joint with silicone before the drain body is installed.
Step 6: Apply liquid membrane coats (if using RedGard or similar)
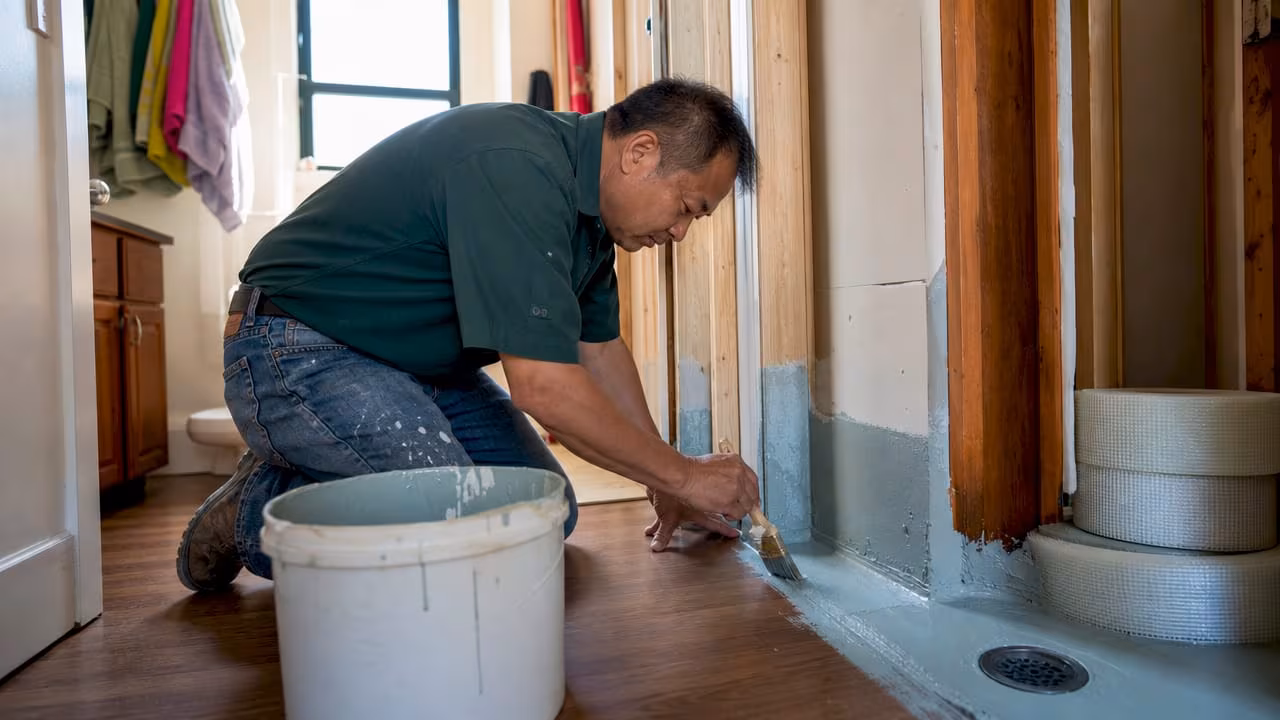
RedGard application requires two coats applied in opposite directions, with full cure time between coats and a pinhole inspection before tiling. Apply the first coat with a roller, working it into corners with a brush. Let it cure until it turns from pink to solid red (typically 1 to 2 hours depending on temperature and humidity). Apply the second coat perpendicular to the first. After the second coat cures, hold a bright flashlight at a low angle and look for thin spots or pinholes. Touch up any gaps with a third coat.
Step 7: Seal tub and shower perimeters with silicone
Sanitary grade silicone sealant applied at tub and shower perimeters requires surface prep and a full 24-hour cure before water exposure. Remove any old silicone completely using a silicone remover and a plastic scraper. Apply painter’s tape on both sides of the joint for a clean line. Press the silicone firmly into the joint with a wet finger or caulk tool, then remove the tape before the silicone skins.
How to verify your waterproofing before tiling: flood testing
Flood testing is the only reliable way to confirm your waterproofing works before you commit to tiling. Skipping this step means the first sign of failure will be a water stain on your ceiling or a soft spot in your subfloor.
Waterproofing membranes must fully cure before flood testing, typically about 24 hours at 70°F, to avoid false results or membrane damage. Rushing this step is one of the most common DIY errors.
Here is the standard flood test procedure:
- Plug the drain with an inflatable drain plug or a rubber stopper.
- Fill the shower pan with water to a level at least 2 inches above the highest point of the pan floor.
- Mark the water level on the wall with a pencil or tape.
- Leave the water in place for a minimum of 24 hours without disturbing it.
- Return and compare the current water level to your mark.
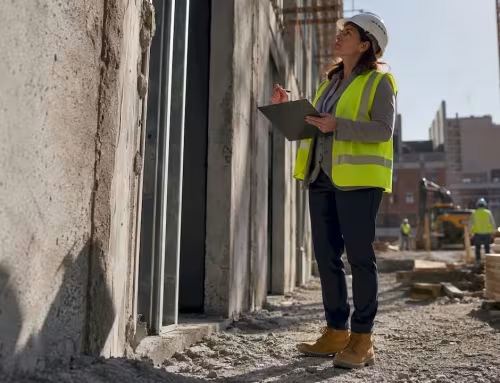
Inspecting the waterproofing work regularly before tiling and performing a proper flood test reduces the chance of hidden leaks that cause costly repairs. After the test, check the ceiling below the shower, the subfloor around the drain, and the wall cavities at the base of the shower for any signs of moisture.
Pro Tip: Photograph the water line mark and the surrounding area before you leave. If a dispute arises later, or if you are selling the home, photographic documentation of a passed flood test is concrete proof of a quality installation.
Common trouble spots to inspect after the flood test include the drain-to-membrane joint, all inside corners, and any seam overlaps you were not fully confident about during installation.
Common waterproofing mistakes to avoid
Most waterproofing failures trace back to a short list of repeatable errors. Recognizing them before you start is more effective than troubleshooting after the fact.
- Relying on grout as waterproofing. Grout is not waterproof. Water passes through it freely. The membrane behind the tile does the work.
- Skipping corner pieces. Folding sheet membrane around corners without pre-formed pieces creates bridging and voids. Proper overlapping and corner detail dramatically improves waterproofing lifespan.
- Poor substrate preparation. A substrate that flexes or has voids will crack the membrane within months. Rigidity is non-negotiable.
- Incorrect drain connection. The membrane must bond to the drain flange. A gap here will leak regardless of how perfect the rest of the installation is.
- Tiling before full cure. Tile weight and mortar moisture can disrupt a membrane that has not fully cured.
- Neglecting silicone maintenance. Silicone at tub and shower perimeters degrades over time. Inspect it annually and replace it every 5 to 10 years.
If a flood test reveals a leak, do not tile over it. Drain the water, dry the area completely, identify the failure point by running your hand along seams and corners while the area is still damp, and apply a compatible repair membrane or additional silicone before retesting.
A thorough inspection of cured membranes can reveal pinholes or thin spots, enabling remediation before tile installation and avoiding costly leaks later. This is especially true for liquid-applied membranes, where application inconsistency is more likely than with sheet systems.
Key takeaways
Effective bathroom waterproofing requires a continuous membrane system, correct seam overlaps, proper drain bonding, and a verified flood test before any tile goes down.
| Point | Details |
|---|---|
| Membrane continuity is non-negotiable | TCNA Method B422 requires a continuous membrane to protect structure behind tile. |
| Corners and drains fail first | Use pre-formed corner pieces and bond the membrane directly to the drain flange. |
| Two coats for liquid membranes | Apply RedGard or similar products in opposite directions with a pinhole inspection between coats. |
| Flood test before tiling | Fill the shower pan and monitor the water level for at least 24 hours after full membrane cure. |
| Silicone needs maintenance | Inspect perimeter silicone annually and replace it every 5 to 10 years to maintain a watertight seal. |
What I’ve learned from years of bathroom waterproofing projects
Most DIYers who call Agny after a failed waterproofing job made the same mistake: they treated waterproofing as a single product application rather than a system. They bought a good membrane, applied it to the walls, and assumed they were done. The drain was connected loosely. The inside corners were folded rather than formed. The flood test was skipped because the membrane “looked fine.”
The corners and the drain are where I focus first on every project. Not because the walls are unimportant, but because a pinhole in the middle of a wall panel is far less likely to cause a leak than a poorly formed inside corner that bridges instead of seals. Modern products like Schluter Kerdi and Laticrete Hydro Ban have made the actual membrane application more forgiving than it was a decade ago. What has not changed is the need for patience at the details.
Curing time is the other area where I see people cut corners. Twenty-four hours feels like a long time when you are excited to tile. But a membrane that has not fully cured will not give you an accurate flood test result, and tile weight on an uncured liquid membrane can create thin spots you will not discover until water is running through your ceiling. The patience you invest in curing and testing is the cheapest insurance you can buy on a bathroom renovation.
If you are new to this, the DIY tile installation guide from Agny covers substrate preparation in detail and pairs well with this waterproofing tutorial. And if you reach the drain connection or the mortar bed slope and feel uncertain, that is the right moment to call a professional. Waterproofing failures are almost always fixable before tiling. After tiling, they are expensive.
— Grzegorz
Ready to upgrade your bathroom with professional waterproofing?
Agny specializes in bathroom renovations across New York, with waterproofing quality built into every project from substrate prep through final tile. If your bathroom project involves complex drain configurations, a mortar bed shower floor, or a full gut renovation, professional installation removes the guesswork entirely.

Agny’s team handles complete bathroom renovations that protect your investment for decades, not just seasons. For homeowners weighing the cost of a full remodel, Agny also offers a review of renovation financing options to make the project budget work. Reach out to Agny directly at agny.nyc to discuss your project scope and get a professional assessment.
FAQ
What is bathroom waterproofing and why does it matter?
Bathroom waterproofing is the process of installing a continuous water-resistant membrane behind tiles and at joints to prevent moisture from reaching the structural framing. Without it, water migrates through grout and causes mold, rot, and structural damage.
How long does waterproofing membrane take to cure before tiling?
Most membranes require approximately 24 hours at 70°F before flood testing or tiling. Follow the specific product instructions, since temperature and humidity affect cure time significantly.
What is a flood test and how do you perform one?
A flood test involves plugging the drain, filling the shower pan with at least 2 inches of water, marking the water level, and checking for any drop after 24 hours. A drop in water level indicates a leak that must be repaired before tiling.
Can you use grout instead of a waterproof membrane?
No. Grout is porous and allows water to pass through freely. The waterproofing membrane behind the tile does the actual work of blocking moisture from reaching the substrate and framing.
How often should silicone seals in a shower be replaced?
Inspect perimeter silicone annually for cracking, shrinkage, or mold growth. Replace it every 5 to 10 years, or immediately if you see gaps, to maintain a watertight seal at tub and shower interfaces.


