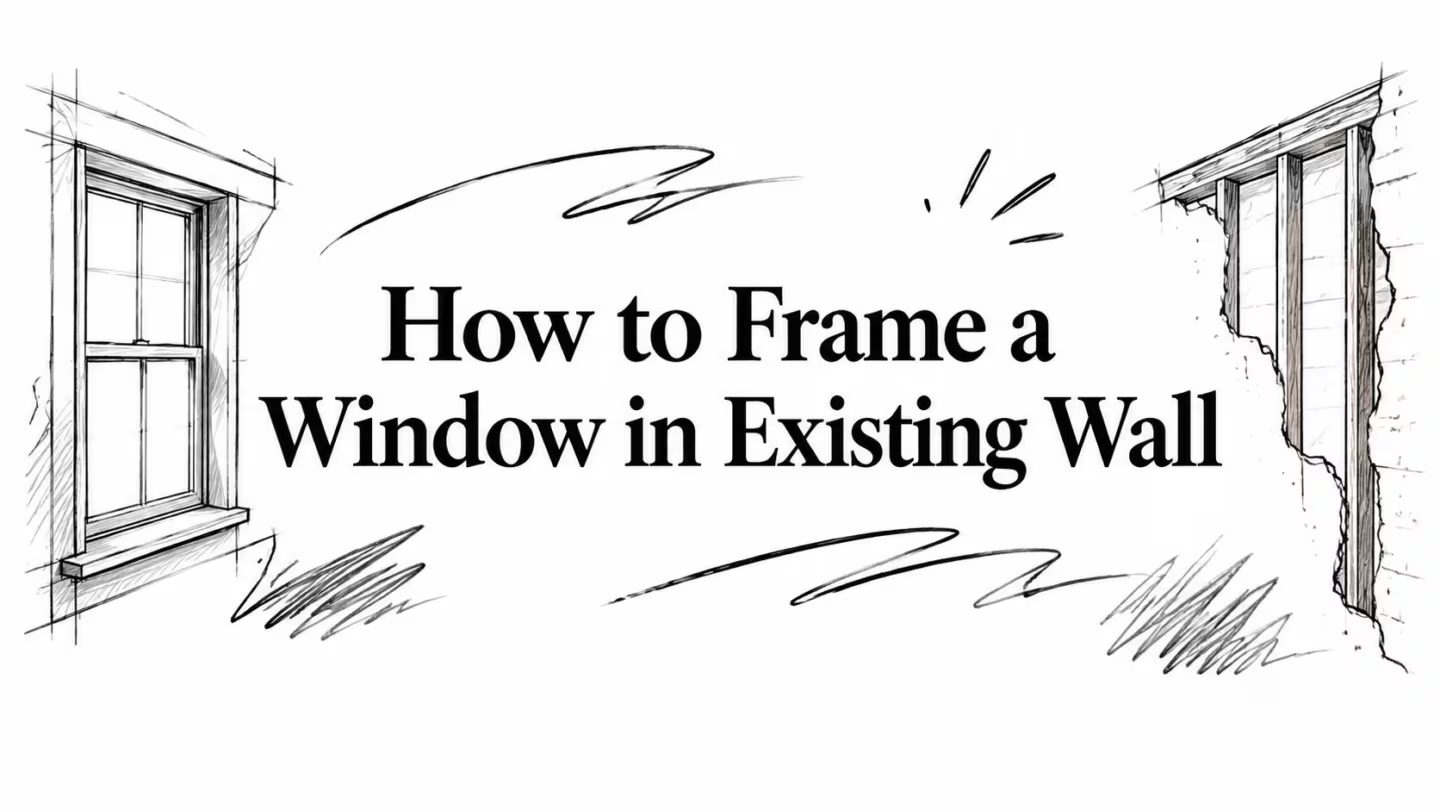
You're standing in a kitchen or brownstone parlor, looking at a blank exterior wall and thinking about the daylight a new window could bring in. The project may appear simple from the room side, but a new opening can change the way the wall carries the building, sheds water, separates apartments, and satisfies an inspector.
The practical question isn't only how to frame a window in an existing wall. It's whether the opening belongs there, how the load will be supported, and whether the work can be approved before the wall is closed. In New York City and New Jersey, those decisions should happen before anyone cuts drywall, sheathing, brick, or studs.
Decide If a New Window Opening Even Makes Sense
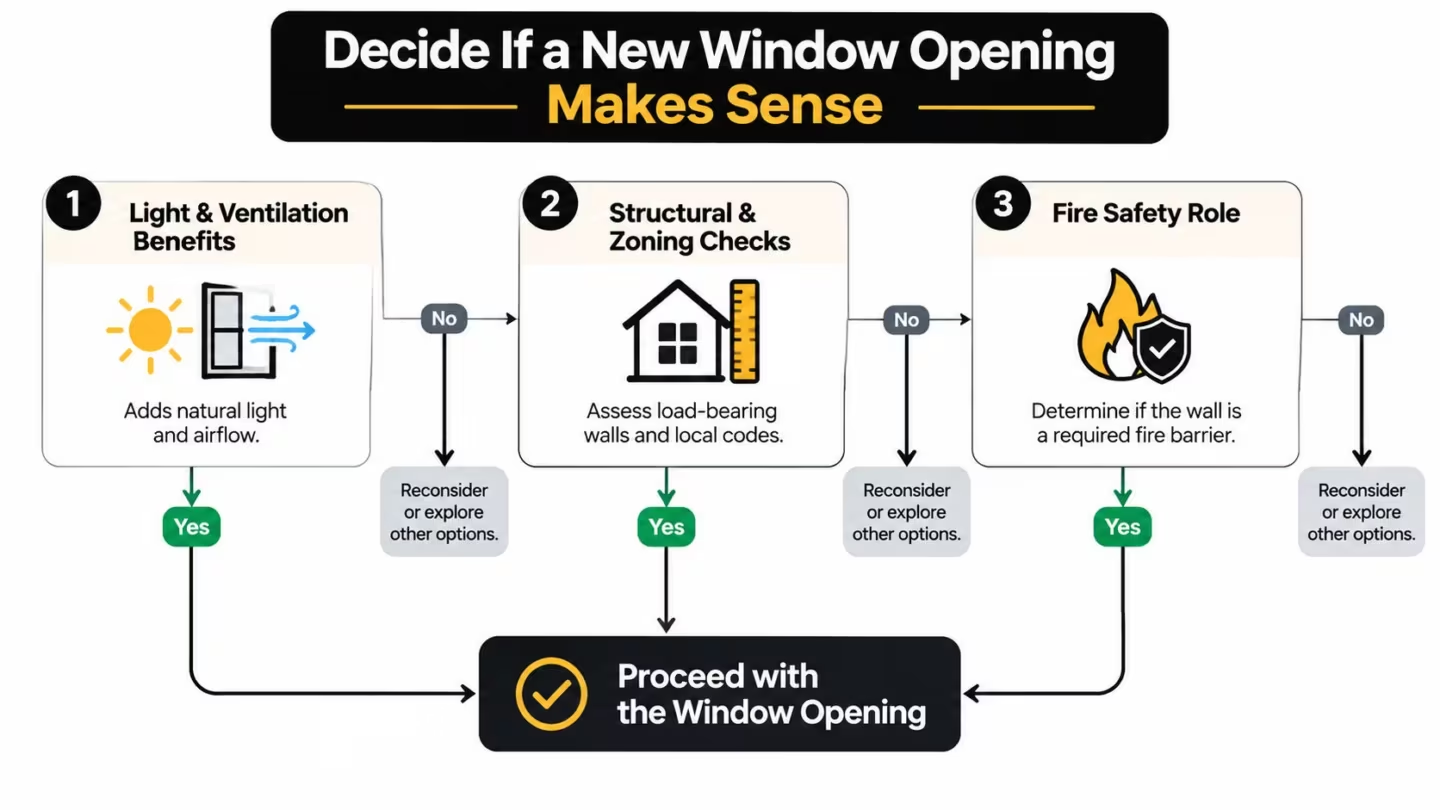
Start with three decisions: structure, permits, and fire separation. A window can improve daylight and ventilation, but the wall may also support floor joists, roof framing, a beam, masonry above, or a transfer point that isn't visible from the finished room. In a brownstone, an apparently ordinary partition can conceal pocket-door framing, utilities, or structural work from an earlier renovation.
Ask whether the proposed opening affects a beam, bearing point, shear wall, mechanical chase, party wall, façade, or required light-and-air condition. If the room is a bedroom, also confirm whether the proposed window must serve emergency escape and rescue requirements. A window selected for appearance may not satisfy those requirements, and a large opening can create a different structural design than a small ventilation window.
Three checks control the concept
Load-bearing role: A load-bearing wall requires a header and a complete transfer path around the opening. The International Residential Code requires a header above every window and door opening in a load-bearing wall, with sizing selected from span tables that account for building width, ground snow load, and supported floors (IRC-based header sizing guidance). That makes a new opening a structural modification, not ordinary trim carpentry.
Permit path: A like-for-like replacement may receive different treatment from a new opening. Chicago guidance, for example, exempts in-kind replacement only when no portion of the exterior wall is cut away, while local guidance identifies changes to the frame, flashing, or exterior wall finish as permit-triggering work (Chicago exterior work permit guidance). NYC work commonly requires Department of Buildings filings through DOB-NOW, and New Jersey projects move through the Uniform Construction Code and the local enforcing agency.
Fire separation: In a multifamily building, the wall may separate units, a corridor, a stair, or another protected area. Chicago's official guidance says openings in walls separating units, corridors, or stairways must be firestopped or otherwise protected (guidance on protected wall openings). A window opening that compromises a required fire barrier can fail even when the lumber framing is sound.
Before finalizing the size, get the manufacturer's rough-opening requirements. A flanged full-frame unit may require exterior trim or siding removal, while a flangeless unit may suit a different installation condition. If masonry, unusual bearing, a substantial span, or an attached building is involved, bring in a New York or New Jersey licensed professional engineer. A useful visual reference for the type of local renovation work involved is this Manhattan and Brooklyn construction project image.
Read the Wall Before You Cut Into It
Treat the first site visit like an inspection, not demolition. From inside the room, locate columns, posts, beams, ducts, plumbing vents, electrical panels, pocket doors, and changes in ceiling height. A proposed window that conflicts with a concealed chase or a stacked opening can force a redesign before the first cut.
Look above the wall, then look below it. Joists running perpendicular to a wood-framed wall may indicate that the wall supports floor or roof load, while joists running parallel may suggest a nonbearing partition. That clue isn't conclusive, especially in attached buildings, older renovations, masonry structures, and homes with beams or girders. For a useful explanation of the broader assessment process, review this guide to load bearing walls from RBA Home Plans.
Read the structure from more than one level
Inspect the floor above when possible. In a basement or crawlspace, look for a girder, foundation wall, post, or beam directly below the proposed opening. A wall that appears lightly framed from the room may transfer load through a hidden beam or may align with a bearing wall on another floor.
In NYC and New Jersey, approved drawings often control the header and support details, particularly in attached, multifamily, and mixed-use buildings. Available building plans can help, but old drawings may not reflect later alterations. Photograph the wall, ceiling, floor, nearby openings, and exterior before removing finishes. Those photographs can document existing conditions for the engineer, contractor, and inspector.
| Observed clue | Likely implication | Next action |
|---|---|---|
| Joists appear perpendicular to the wall | The wall may support floor or roof load | Have the load path reviewed before cutting |
| A beam, girder, or post aligns with the wall | The wall may carry concentrated load | Identify bearing points and obtain structural direction |
| Masonry, concrete, or a party wall is involved | Rule-of-thumb wood framing may not apply | Use a licensed professional engineer |
| Pipes, ducts, or electrical equipment sit near the opening | The opening may conflict with building systems | Mark utilities and coordinate relocation |
| The wall separates units, a corridor, or a stair | Fire separation may be part of the wall's function | Confirm the approved firestopping and protection detail |
Utilities must be marked before probing or cutting. Use 811 utility locating information as a starting point, and confirm whether private utility locating is also needed for the property. Temporary shoring must support the existing load path before the wall is opened. If you can't clearly explain what bears on the wall and where that load will go during the work, the wall isn't ready to cut.
Measure and Lay Out the Rough Opening
The window unit controls the rough opening, not the other way around. Obtain the manufacturer's installation instructions and record the exact rough-opening width, height, sill requirements, head clearance, flange type, and allowable shimming space. Manufacturer guidance and industry practice commonly allow about 1/2 inch to 3/4 inch of extra width and height, but the applicable tolerance must come from the specific product documentation (window framing and rough-opening guidance).
Measure the existing wall in several locations. Older timber framing, masonry openings, and previous repairs often aren't square, and a drawing dimension won't correct a wall that has moved or settled. Check the proposed head height against the required header, ceiling framing, wiring, vents, hydronic piping, and neighboring openings.
Lay out both faces of the wall
Mark the finished window centerline first. Then mark the rough-opening width and height, leaving room for the king studs, jack studs, header, sill, and installation tolerance. Transfer the layout to both faces of the wall. If the two faces don't agree, stop and resolve the discrepancy before demolition.
Keep the demolition boundary separate from the rough-opening line. You may need to remove enough drywall, plaster, sheathing, siding, or trim to work safely, but unnecessary removal increases repair work and can expose the weather-resistive barrier or fire-rated assembly more than planned.
Use a level, framing square, chalk line, and tape measure. Check both diagonals to confirm the proposed opening is square, then remeasure after snapping the lines. Mark known electrical, plumbing, and mechanical paths directly on the wall and compare the field layout with the permit drawings.
Practical rule: Excessive shimming is not a substitute for a correctly framed rough opening. If the field dimensions don't fit the manufacturer's tolerance, change the framing plan before the window arrives.
The window's complete installation profile matters. Include nailing fins, flanges, extension jambs, sill-pan depth, drainage paths, interior air-sealing space, and exterior trim. A nominal window size alone doesn't tell the carpenter how large the framed opening must be.
Shore, Cut, and Build the New Frame
A load-bearing cut-in starts with temporary support. Shore directly beneath the existing load path, usually with a temporary header beam supported by T-shaped posts or another engineered arrangement. The shoring must carry the load before drywall, plaster, sheathing, or studs come out. Its capacity and placement depend on the building, floor condition, access, and loads above. In a NYC or NJ permitted project, have the qualified contractor or engineer establish this setup before demolition, because an inspector will expect the temporary and permanent load paths to make sense.
Expose both faces of the wall and verify the opening before cutting structural members. Remove finishes carefully, identify utilities, and confirm that the field layout matches the approved dimensions. A circular saw set to the sheathing depth works for controlled cuts through wood sheathing. Use a reciprocating saw at corners and where a circular saw cannot run safely.
Build the transfer path
Each framing member has one job (practical window opening framing sequence):
- Install king studs. Place full-height studs outside the opening. They provide the main vertical support for the header and tie the new frame into the existing wall.
- Install jack studs. Also called trimmer studs, these support the header ends and run from the sill or bottom framing to the underside of the header.
- Set the header. The header spans the opening and transfers supported loads to the jack studs. Size it from the applicable span table or an engineered design, not from whatever lumber is available.
- Frame the sill. Install the rough sill at the specified window height and support it with the required cripple studs below.
- Add cripples. Short studs above the header and below the sill continue the wall framing pattern and provide backing for sheathing and finishes.
Header selection depends on span, building width, snow load, and the number of floors supported. The IRC-based sizing reference cited earlier shows why a rule such as “just double up a 2×10” cannot replace the applicable table or an engineer's design. In multifamily work, the approved plans may also require fireblocking or firestopping around the new opening, particularly where the wall is part of a rated assembly. Do not close the wall until that detail is installed and available for inspection.
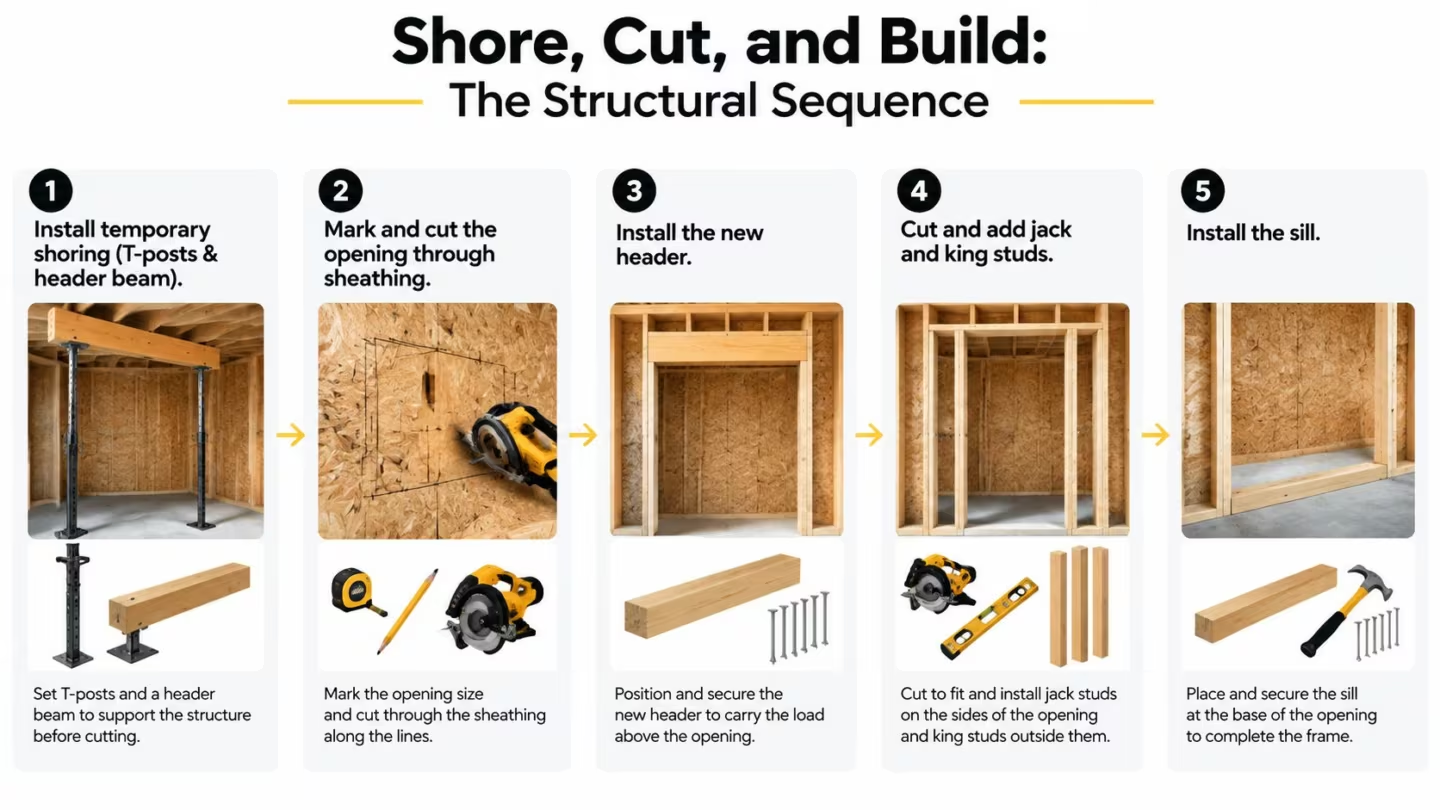
Fasten with structural screws or nails in the locations and pattern required by the approved design. Check that the king studs are plumb, the jack studs bear fully under the header, and the sill is level. Measure both diagonals before closing the wall. An out-of-square opening can bind the window, complicate sealing, and force excessive shimming.
A short demonstration can help visualize the order of operations:
The rough-framing inspection should find a continuous load path from the header through the jack and king studs into the supporting structure. For a local reference to carpentry work, see this Manhattan and Brooklyn carpentry contractor image.
Flash and Waterproof the Opening
A structurally correct opening can still fail if water enters around the window. The new framing must connect to the existing weather-resistive barrier, flashing, siding, masonry, and interior air-control layers. Most serious window callbacks come from treating flashing as a final bead of caulk instead of a drainage system.
Inspect the exposed house wrap or felt around the cut. Slit it cleanly at the corners, fold it into the opening, and preserve enough material to integrate the new unit. If the existing WRB is damaged or missing, the repair must be coordinated with the exterior cladding system rather than hidden behind trim.
Build a drainage path
Install a sloped sill pan using a preformed PVC or EPDM product, or construct a site-built pan that directs water toward the exterior. The pan needs upturned jamb legs and an interior back dam so water cannot move into the wall cavity. The exact pan geometry must suit the window and wall condition.
Apply flexible butyl or self-adhered flashing at the jambs, then across the sill on top of the pan. Each layer should overlap in shingle fashion, with the upper layer shedding onto the lower layer. Reverse laps create a path for wind-driven water to travel behind the membrane.
At the head, integrate the upper WRB flap behind the sheathing or flashing layer as designed. The lower flap should lap over the head flashing or flange after the window is installed. Don't seal the bottom of a nailing flange in a way that blocks drainage. The bottom edge is commonly part of the escape route for water that reaches the sill pan.
The window type affects the exterior work. A flanged full-frame unit can connect directly to the new opening's flashing and sheathing layers, but it may require removal or careful cutting back of siding and trim. A flangeless full-frame unit can suit a different renovation condition. The manufacturer's instructions govern the sequence.
Insulate, Set the Window, and Pass Inspection
The final installation has two separate standards. The window must operate as a window, and the wall must continue to perform as a structural, thermal, air, water, and fire-resistance assembly. A carpenter who focuses only on getting the sash to open can leave the inspector, the homeowner, or the next heavy rain to find the problem.
Start with the cavity around the frame. Insulate the header, jack-stud bays, sill area, and accessible perimeter without pushing the window out of square. Closed-cell spray foam can provide air sealing in suitable conditions, while mineral wool may be appropriate where fire-resistance or material compatibility controls the detail. The product and installation must match the approved assembly, especially in multifamily construction.
A useful general reference on why insulation material and cavity conditions need careful assessment is this discussion of cavity wall insulation risks from Corinthian Surveyors London LTD. The source is outside the NYC and New Jersey code process, but the practical point applies broadly: filling a cavity without controlling moisture, air movement, and material compatibility can create a hidden problem.
Preserve fire and air control
In an attached or multifamily building, firestopping deserves its own inspection. If the wall separates apartments, a corridor, a stair, or another protected area, the perimeter around the opening may need mineral wool, intumescent sealant, or another approved protection system. The material, depth, continuity, and installation location must follow the approved plans and applicable code.
Don't use ordinary canned foam as a substitute for a rated firestop. Don't leave an open cavity at the head or jamb where a concealed fire can bypass the wall. The window frame itself may not restore the rating of a wall that was cut open. That responsibility belongs to the complete tested or approved assembly.
Set the unit without distorting it
Dry-fit the window before applying permanent fasteners. Confirm that the sill is level, place shims at the corners and intermediate support points required by the manufacturer, and check each jamb for plumb. Measure the diagonals of the installed frame, then operate the sash before final fastening.
Fasten through the flange or frame according to the manufacturer's spacing and fastener requirements. The window must sit against the intended plane of the wall, with the flange fully supported and the sill pan correctly connected. Don't draw a bowed frame tight with fasteners. That can make the window difficult to operate and can compromise seals.
Apply exterior flashing in sequence. Tape the side flanges first, then the top flange so the head layer laps over the sides. Complete the WRB integration above the unit before installing exterior trim. At the interior, use low-expansion window and door foam sparingly in the perimeter gap. High-expansion foam can bow the frame, especially when the installer fills the joint in one pass.
Prepare for the rough-framing inspection
For NYC work, the permit and filing requirements should be confirmed before construction begins. Window enlargements and new openings may require a DOB-NOW work permit with PW1 and TR-1 filings, followed by the required inspection process. The exact filing path depends on the building, scope, professional involvement, and current Department of Buildings requirements.
New Jersey projects move through the UCC and the local municipal subcode official. The local authority determines the permit sequence and inspection requirements. A replacement that leaves the existing opening intact can follow a different path from cutting a new opening into the exterior wall.
Before scheduling the inspector, check the work against the approved documents:
- Header: Confirm that the installed header matches the approved schedule, span, bearing, and support details.
- Rough opening: Verify that the opening fits the actual window SKU on site, not merely the window shown in an estimate.
- Load path: Check that king studs, jack studs, header, sill, and cripples are installed continuously and fastened as designed.
- Fire separation: Confirm that rated wall conditions have continuous, approved firestopping around the opening and adjacent concealed spaces.
- Weather control: Photograph the sill pan, flashing laps, WRB integration, and exterior drainage before trim covers them.
- Insulation and air sealing: Document the cavity treatment before drywall or interior casing closes the work.
- Utilities: Verify that relocated electrical, plumbing, and mechanical work is complete and accessible for inspection where required.
Save photographs in sequence. Inspectors may ask to see concealed layers, and clear documentation helps reconcile the finished wall with the approved construction. Don't close the opening prematurely because the rough-framing sign-off is part of the project, not an administrative detail.

For a homeowner, the safest division of labor is clear. You can help select the window, confirm the desired height, document existing finishes, and coordinate access. Structural review, shoring, cutting a bearing wall, fire-rated detailing, flashing integration, and permit inspections belong with professionals who understand the building and the local authority.
AGNY Services LLC coordinates window framing, carpentry, permitting support, and installation work for residential and commercial projects in New York and New Jersey. If you're considering a new opening, visit AGNY Services LLC to arrange a consultation that begins with the wall, the approved window details, and the inspection path before construction starts.